

OAuth
What is OAuth?
OAuth 2.0 is a protocol that will let your app connect to bunq users in a safe and easy way. Please be aware that if you will gain access to the account information of other bunq users or initiate a payment for them, you may require a PSD2 permit.
Get started with OAuth for bunq
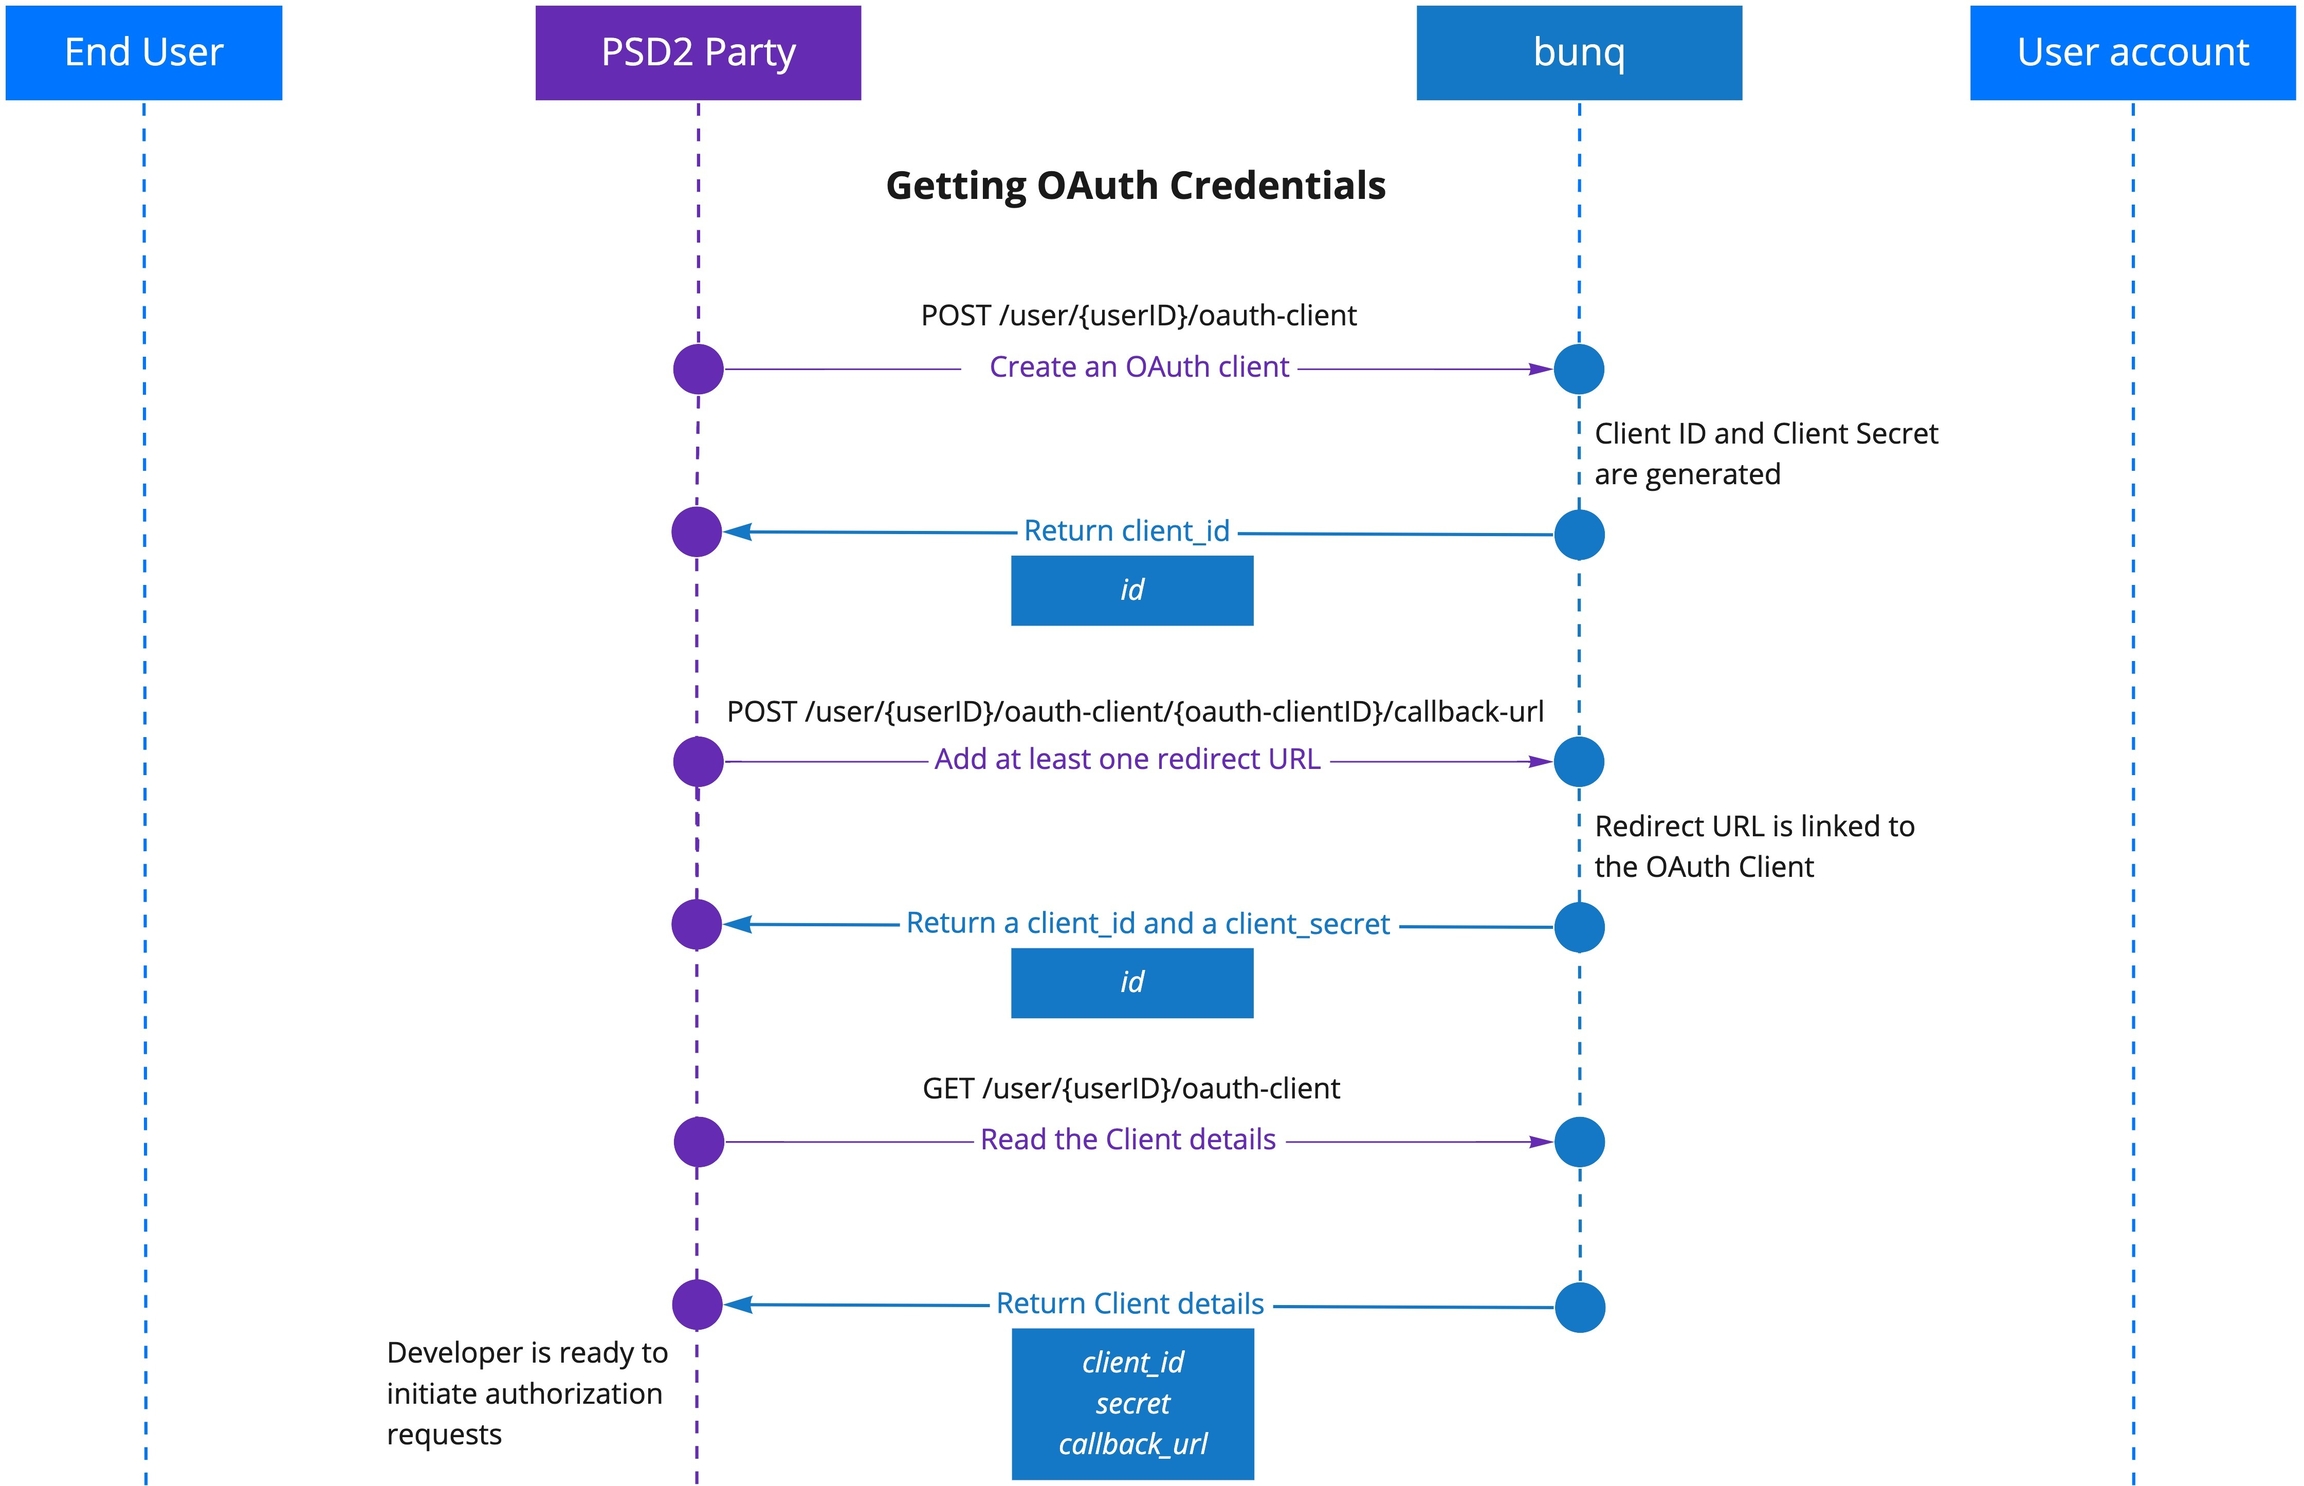
To initiate authorization into the bunq user accounts, you need to create an OAuth Client and register at least 1 redirect URL for it.
You can have 1 OAuth Client at a time. Reuse your OAuth credentials for every authorization request.
The list of steps below will help you to get started:
Register an OAuth Client by creating an app in bunq Developer.
Add one or more Redirect URLs.
Get your
client_idandsecretfrom your app information tab in bunq Developer.Redirect your users to the OAuth authorization request URL.
If the user accepts the authorization request, they will be redirected to the previously specified
redirect_uriwith an authorizationcodeparameter.Use the token endpoint to exchange the authorization
codefor anaccess_token.Use the
access_tokenas a normal API Key. Open a session or use our SDKs to get started.
You can set up an OAuth Client and add redirect URLs to it using the dedicated endpoints too. Follow the flow below to do it programmatically.
ℹ️ As a PSD2 user, you cannot log in to the bunq app. You need to follow the flow below to register an OAuth Client for your application.
What can my apps do with OAuth?
We decided to launch OAuth with a default permission that allows you to perform the following actions:
read and create Monetary Accounts;
read Payments & Transactions;
create Payments between Monetary Accounts of the same user;
create Draft-Payments (the user will need to approve the payment using the bunq app);
assign a Monetary account to a Card;
read, create and manage Cards;
read and create Request-Inquiries
read Request-Responses.
As a PSD2-licensed developer, you are limited to the permission scopes of your role.
Authorization request
Your web or mobile app should redirect users to the following URL:
https://oauth.bunq.com/auth
The following parameters should be passed:
response_type- bunq supports the authorization code grant, providecodeas parameter (required)client_id- your Client ID, get it from the bunq app (required)redirect_uri- the URL you wish the user to be redirected after the authorization, make sure you register the Redirect URL in the bunq app (required)state- a unique string to be passed back upon completion (optional)
Use https://oauth.sandbox.bunq.com/auth in the sandbox environment.
Authorization request example:
Authorization request response:
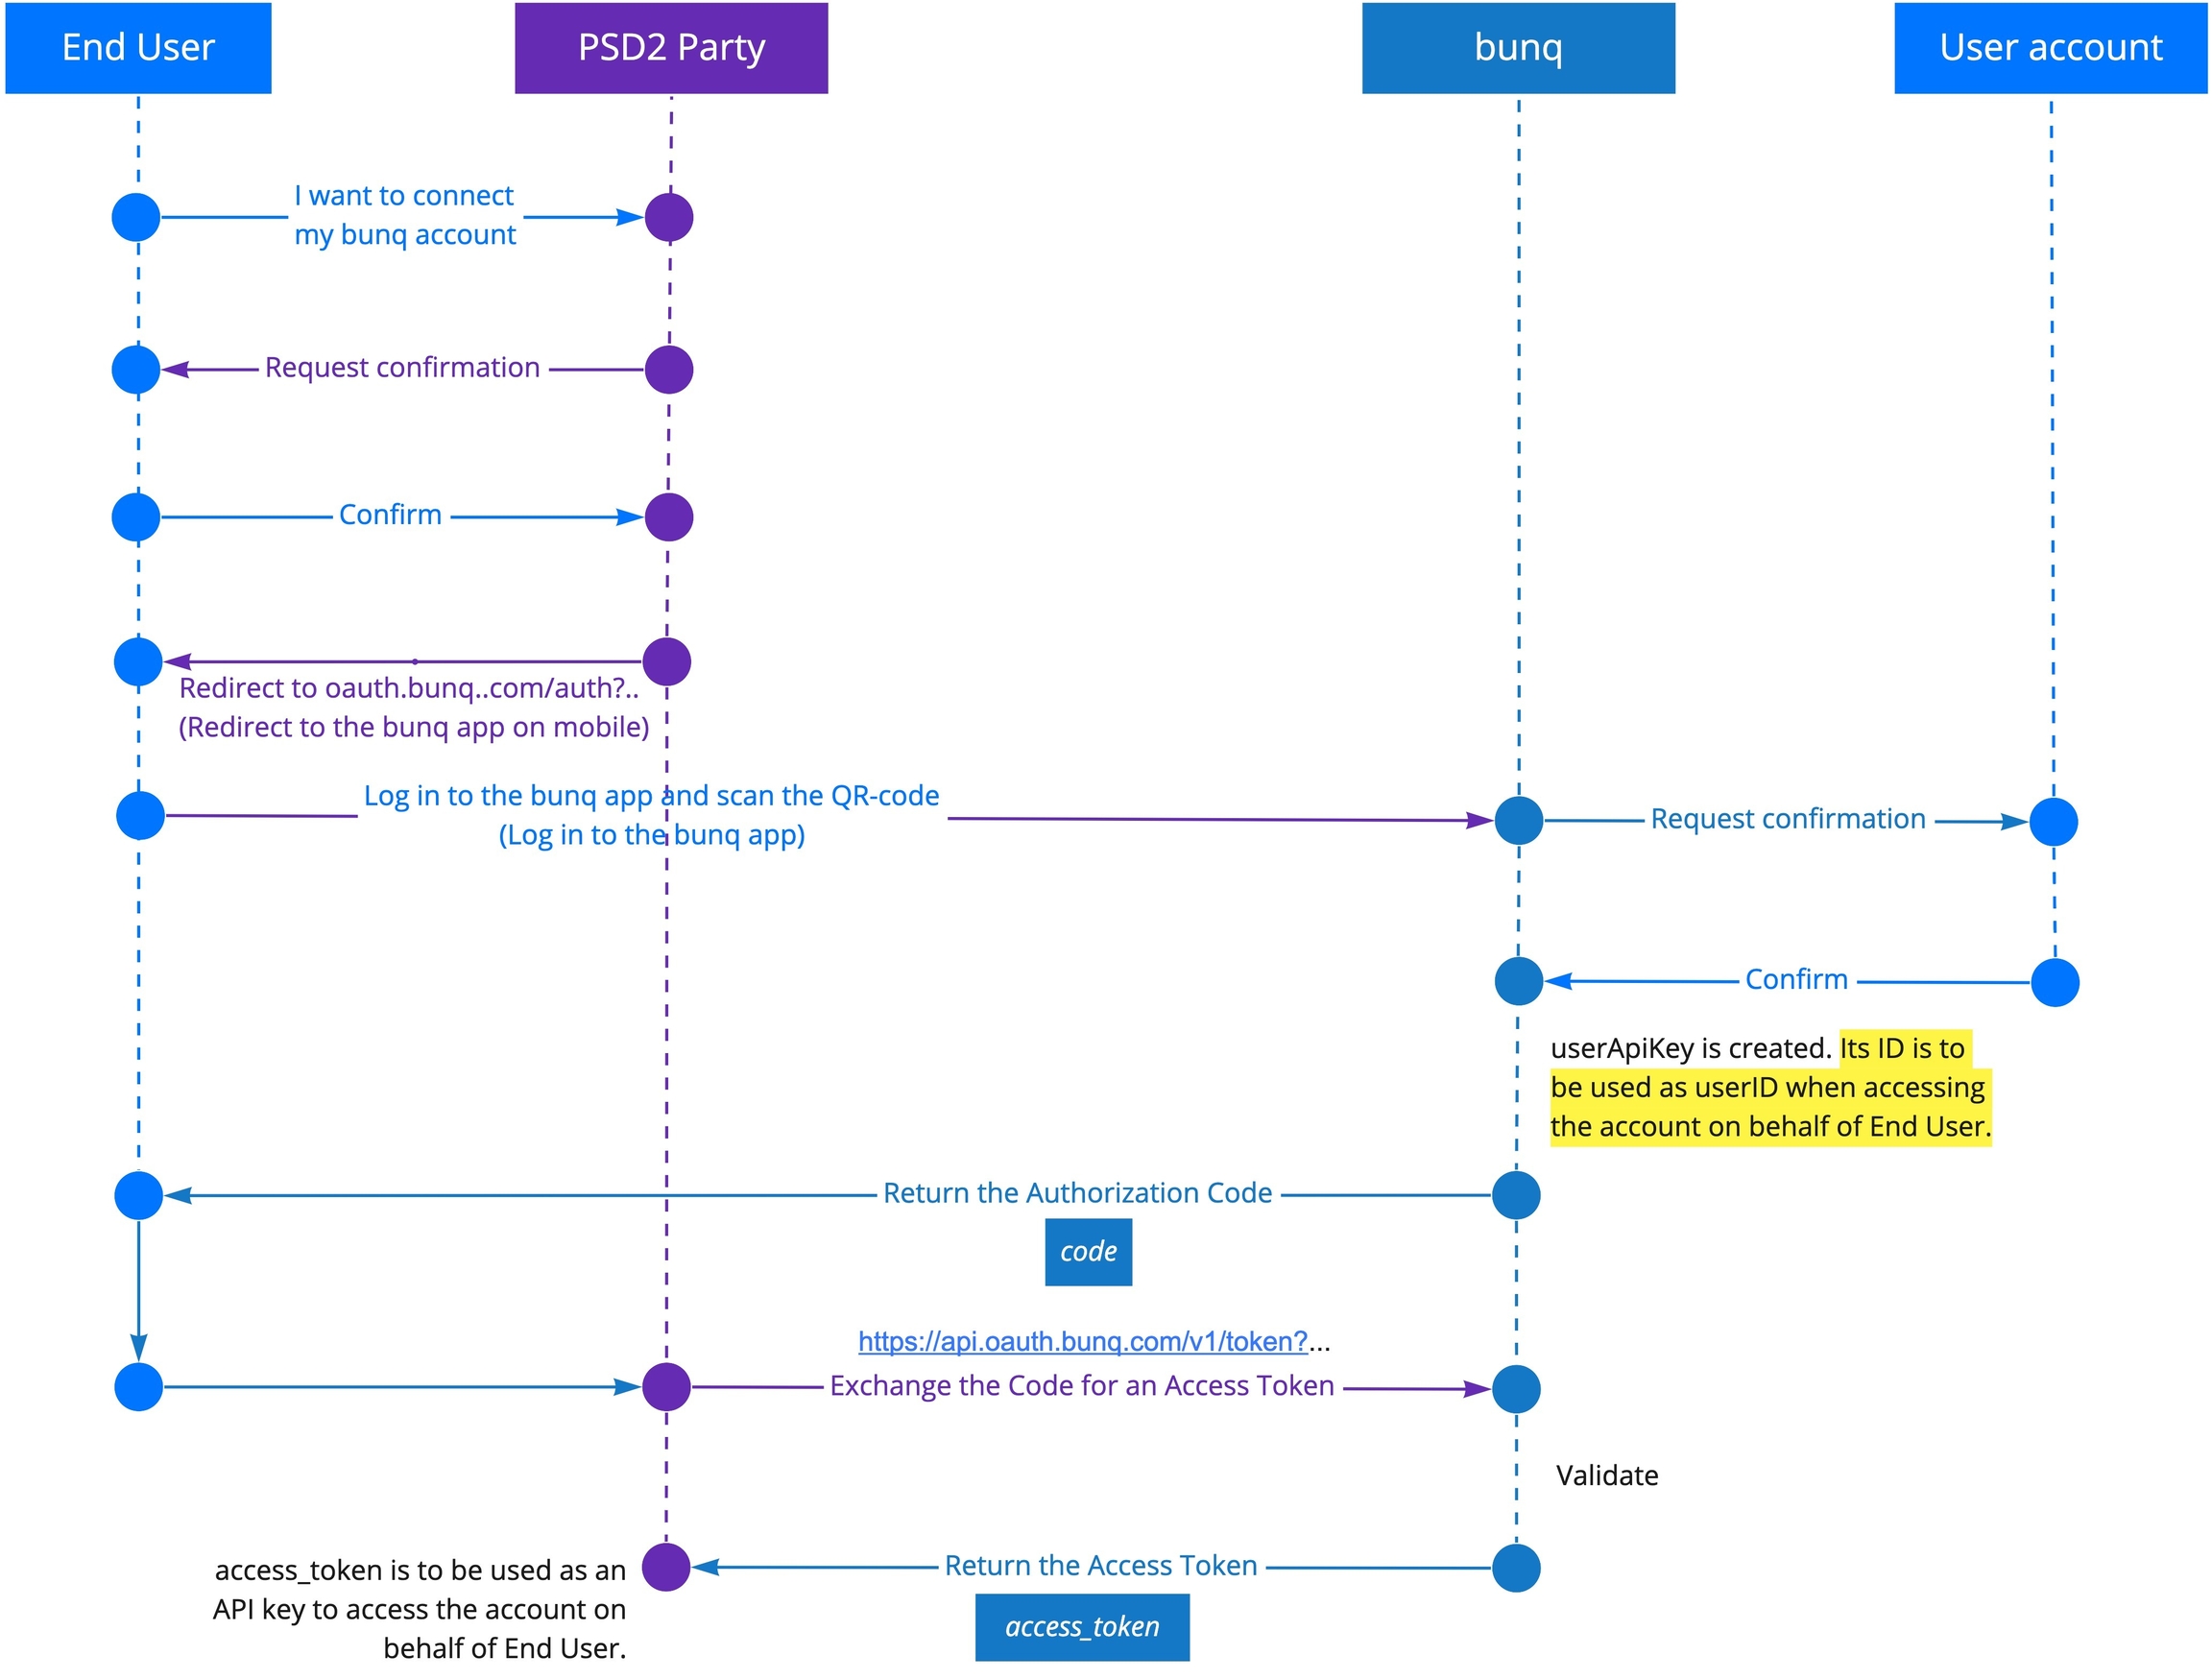
Token exchange
If the authorization request is accepted by the user, you get the authorization code. Exchange it for an access_token.
Make a POST call to https://api.oauth.bunq.com/v1/token . Pass the following parameters as GET variables:
grant_type- the grant type used,authorization_codefor now (required)code- the authorization code received from bunq (required)redirect_uri- the same Redirect URL used in the authorisation request (required)client_id- your Client ID (required)client_secret- your Client Secret (required)
Use https://api-oauth.sandbox.bunq.com/v1/token in the sandbox environment.
Token request example:
Note: The request should only contain URL parameters. No body is expected.
Example successful response:
Example error response:
What's next?
To start sending calls to the account of the user who has accepted your authorization request, create an API context for the access_token you have received as the result of the token exchange. The access_token can be used as a normal API key. Please continue with Authentication.
NOTE: When connecting to a bunq user's account using OAuth, you create a new user (userApiKey) that has its own id and access_token . When sending a request on behalf of a user connected to your app via OAuth, use the id of userApiKey as userId and the item ids of the bunq user (grantedByUser).
Example of a successful request URL:
When calling GET /user/{userID}, you might expect to get UserPerson or UserCompany. Instead, you will get the UserApiKey object, which contains references to both the user that requested access (you) and the user that granted access (the bunq user account that you connected to).

Using the Connect button
All good? Ready to connect to your bunq users? Refer to our style guide and use the following assets when implementing the Connect to bunq button.
Visit us on together.bunq.com, share your creations, ask question and build your very own bunq app!
Last updated